4. Customers
4.1 Adding a Customer
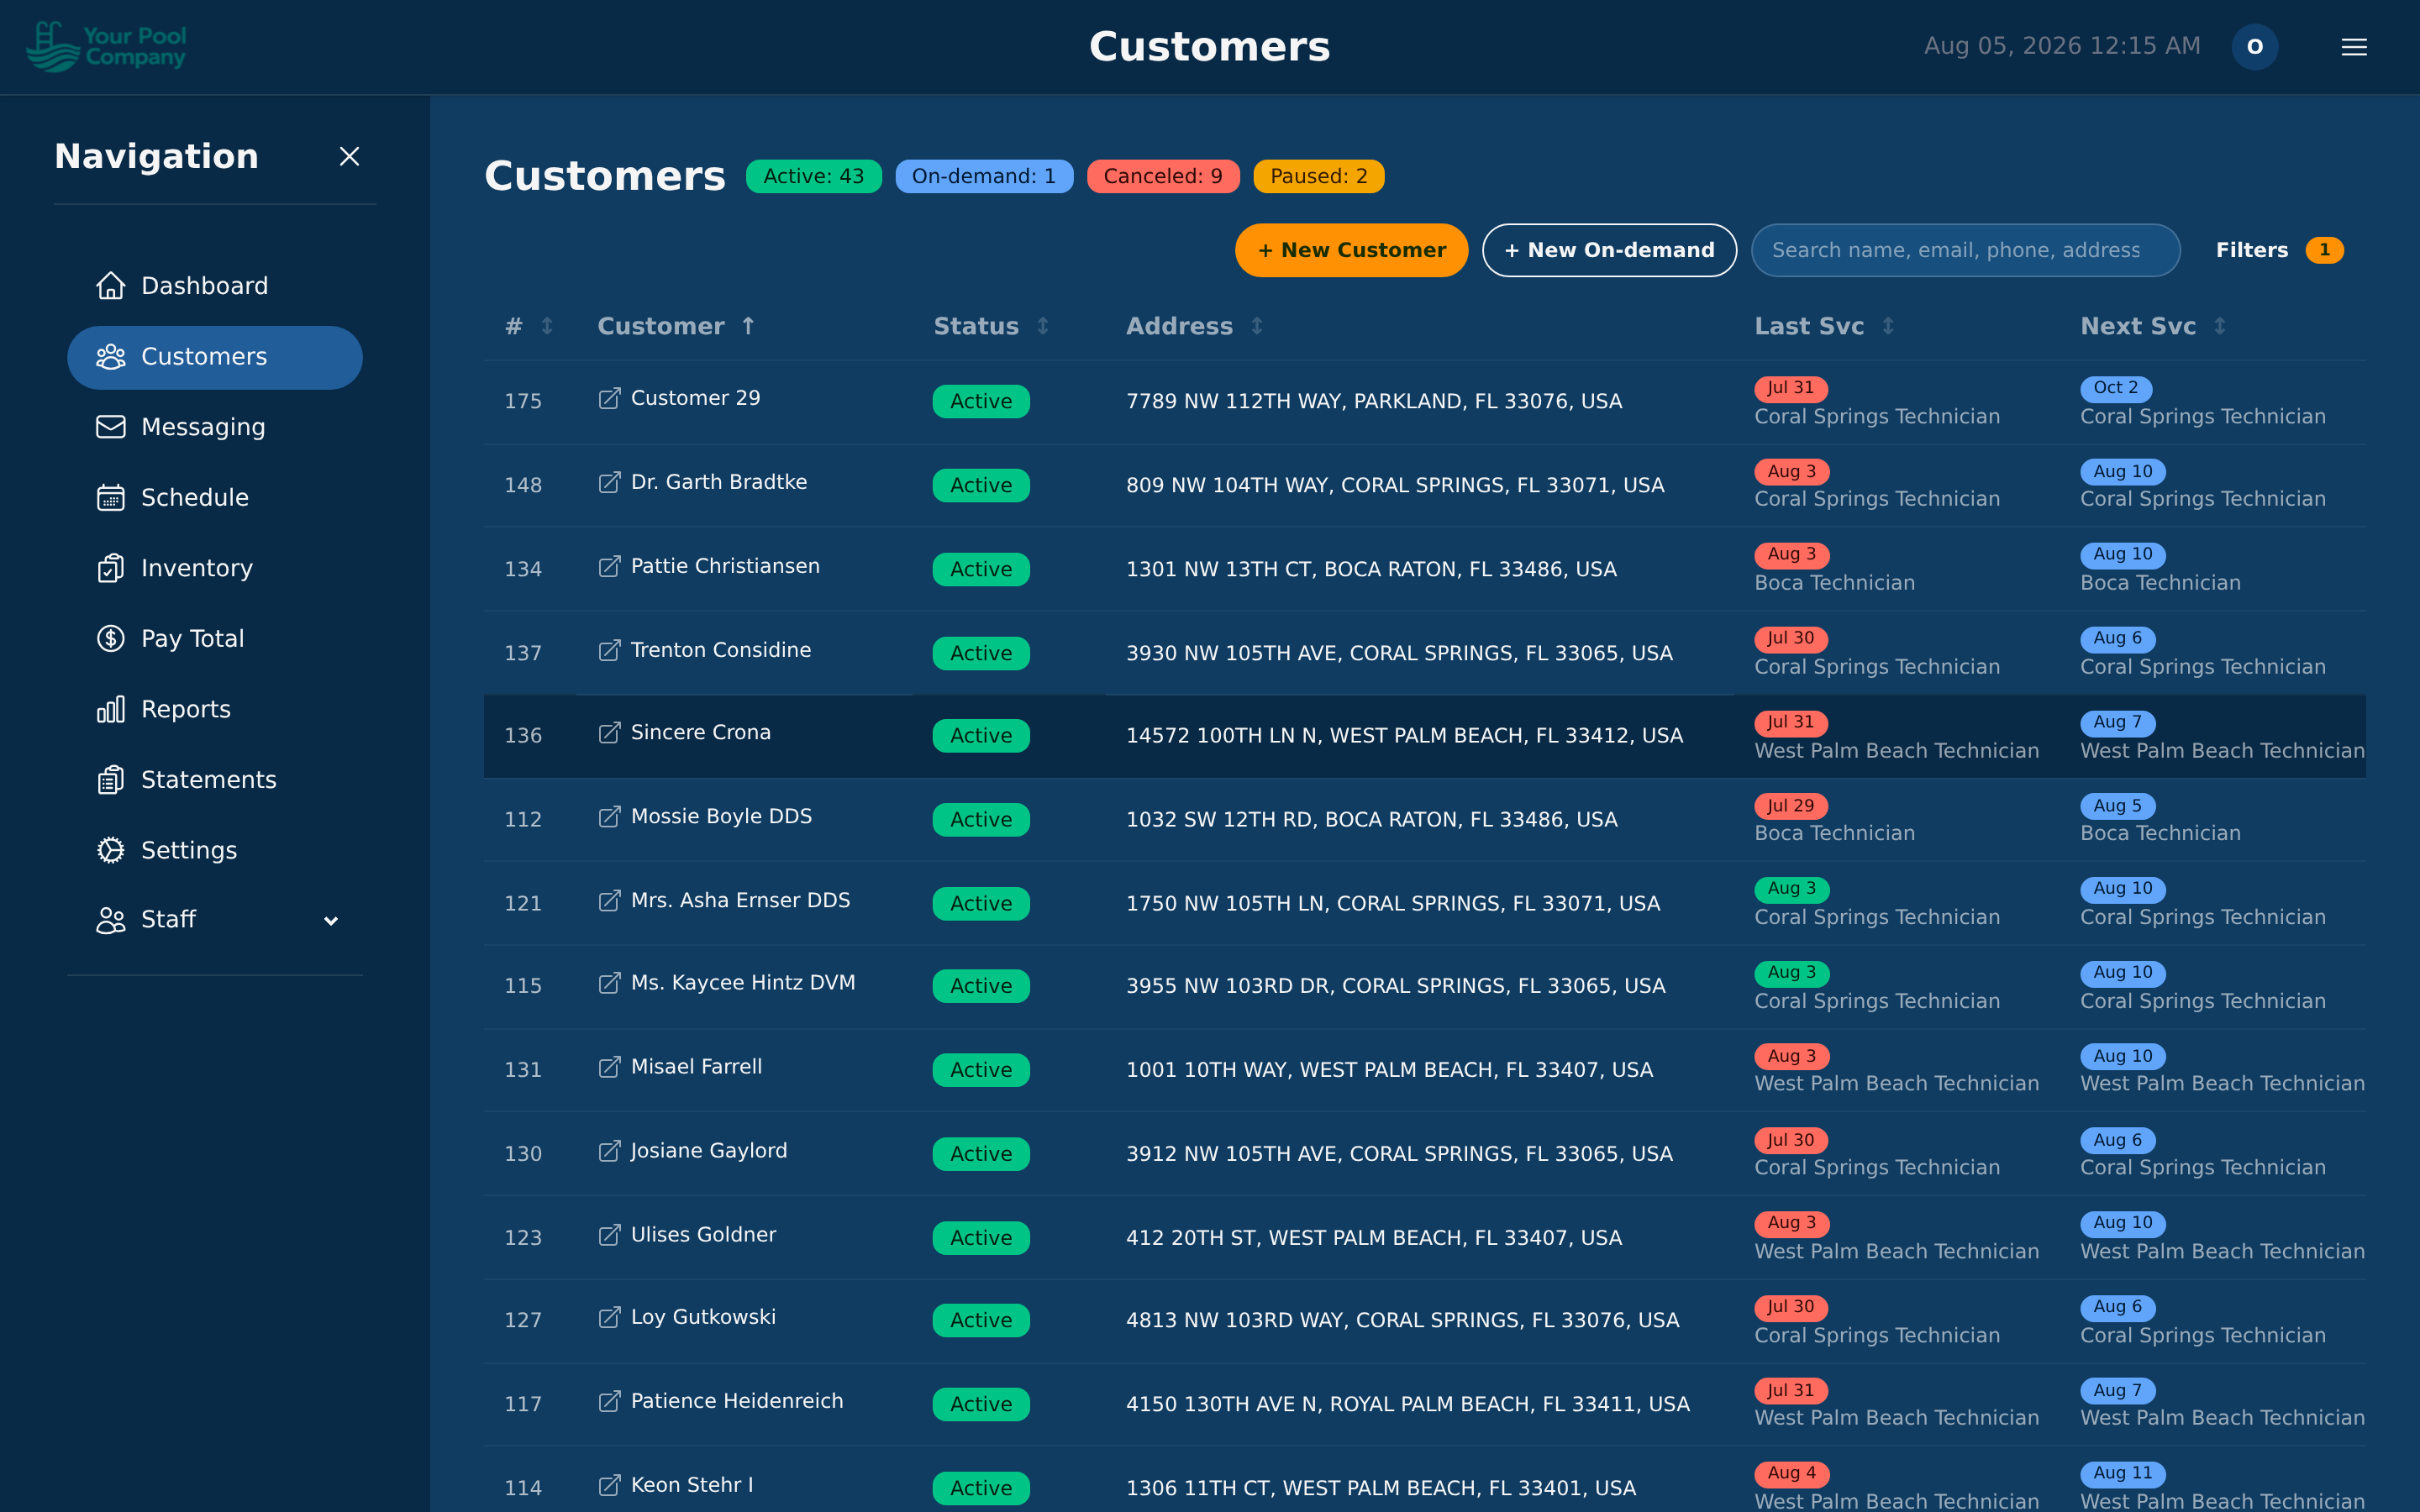
Go to Customers and click + New Customer. That opens a short wizard that sets up the customer and their first repeating service together.
If it's a one-off job rather than a regular customer, use + New On-demand instead — see Section 8.
Required Information:
- Name — the customer's full name (or business name).
- Email — their primary email address (used for statements, pool service reports, and portal access).
Optional Information:
- A second email address — see 4.2
- Phone number(s) — you can add multiple phone numbers with types (mobile, home, office)
- General notes
- Statement delivery preference (email or print)
- Autopay opt-in setting
After creating a customer, you'll add their service location(s) and set up a subscription.
4.2 Adding a second email address
Some customers want two people to get everything — a husband and wife, an owner and their property manager, a homeowner and their bookkeeper. You can give any customer a second email address.
Where it is: open the customer, click Edit, then click the small + Secondary email button under the email box. It stays hidden until you need it, so the form isn't cluttered for the customers who don't.
What it does: every email EZ Pool Biller sends that customer goes to both addresses — statements, pool service reports, payment receipts, reminders. You don't have to do anything else.
If a customer's main email is missing or was never a real address, the second one is used on its own — for sending, and everywhere their email is shown.
4.3 Customer Locations
A customer can have multiple service locations (e.g., a homeowner with a primary residence and a vacation property, or a property manager with several addresses).
Adding a Location:
- Open the customer's profile.
- Click Add Location.
- Enter the address (street, city, state, zip code).
- The system automatically geocodes the address (converts it to GPS coordinates) for route mapping.
- Add optional service instructions (e.g., "Gate code: 1234", "Dog in backyard", "Equipment is behind the shed").
Service Windows: For each location, you can set allowed service times per day of the week:
- Monday: 8:00 AM – 5:00 PM
- Tuesday: closed
- Wednesday: 8:00 AM – 12:00 PM
- etc.
This ensures the route optimizer only schedules visits during allowed hours. Leave a day empty if the location cannot be serviced that day.
Billing Address: Mark one location as the billing address. This appears on statements and PDFs.
4.4 Contact Information & Notes
Phone numbers
- Add multiple phone numbers per customer.
- Mark one as primary.
- Indicate which numbers allow SMS (for text notifications).
Only one number can be the primary SMS number — that's the one text messages and appointment reminders go to. If a customer has a mobile and a landline, make sure the mobile is the one marked for SMS, or the texts go nowhere.
CC emails — copies for other people
Separate from the second email address in 4.2. A CC email is someone else who should get copies — a property manager, an accountant, a grown-up child handling their parent's account.
Find them on the customer's Details tab or Messages tab. For each address you add:
| Setting | What it does |
|---|---|
| Where the copy goes | |
| Label | A note for you, so you remember who it is |
| Message Types | Which emails this person gets |
The types are All Messages, Statements, Visit Reports, and Messages (the ones you send by hand from the Messages tab). Pick one or several — a bookkeeper might only want Statements.
You can switch a CC address off without deleting it, for someone who should stop getting copies for a while.
The customer's own address stays in the To field; CC addresses get a copy. Nobody is emailed twice — if a CC address is the same as the customer's own first or second address, it's skipped automatically.
Which should I use?
- The customer has two addresses of their own → second email address (4.2). They get everything, and it's one field.
- Someone else needs copies, or only needs certain emails → CC email.
Customer notes
These are notes about the customer, not about one particular visit.
- Add free-form notes to a customer's account.
- Pin important notes so they always appear at the top.
- Notes are visible to all staff with customer access but are never shown to the customer.
Use these for anything that stays true — "always call before arriving", "the bill goes to the property manager", "difficult access, allow extra time".
For something that only matters on one day, use the notes on that individual pool service instead — see 4.8.
4.5 Finding customers in the list
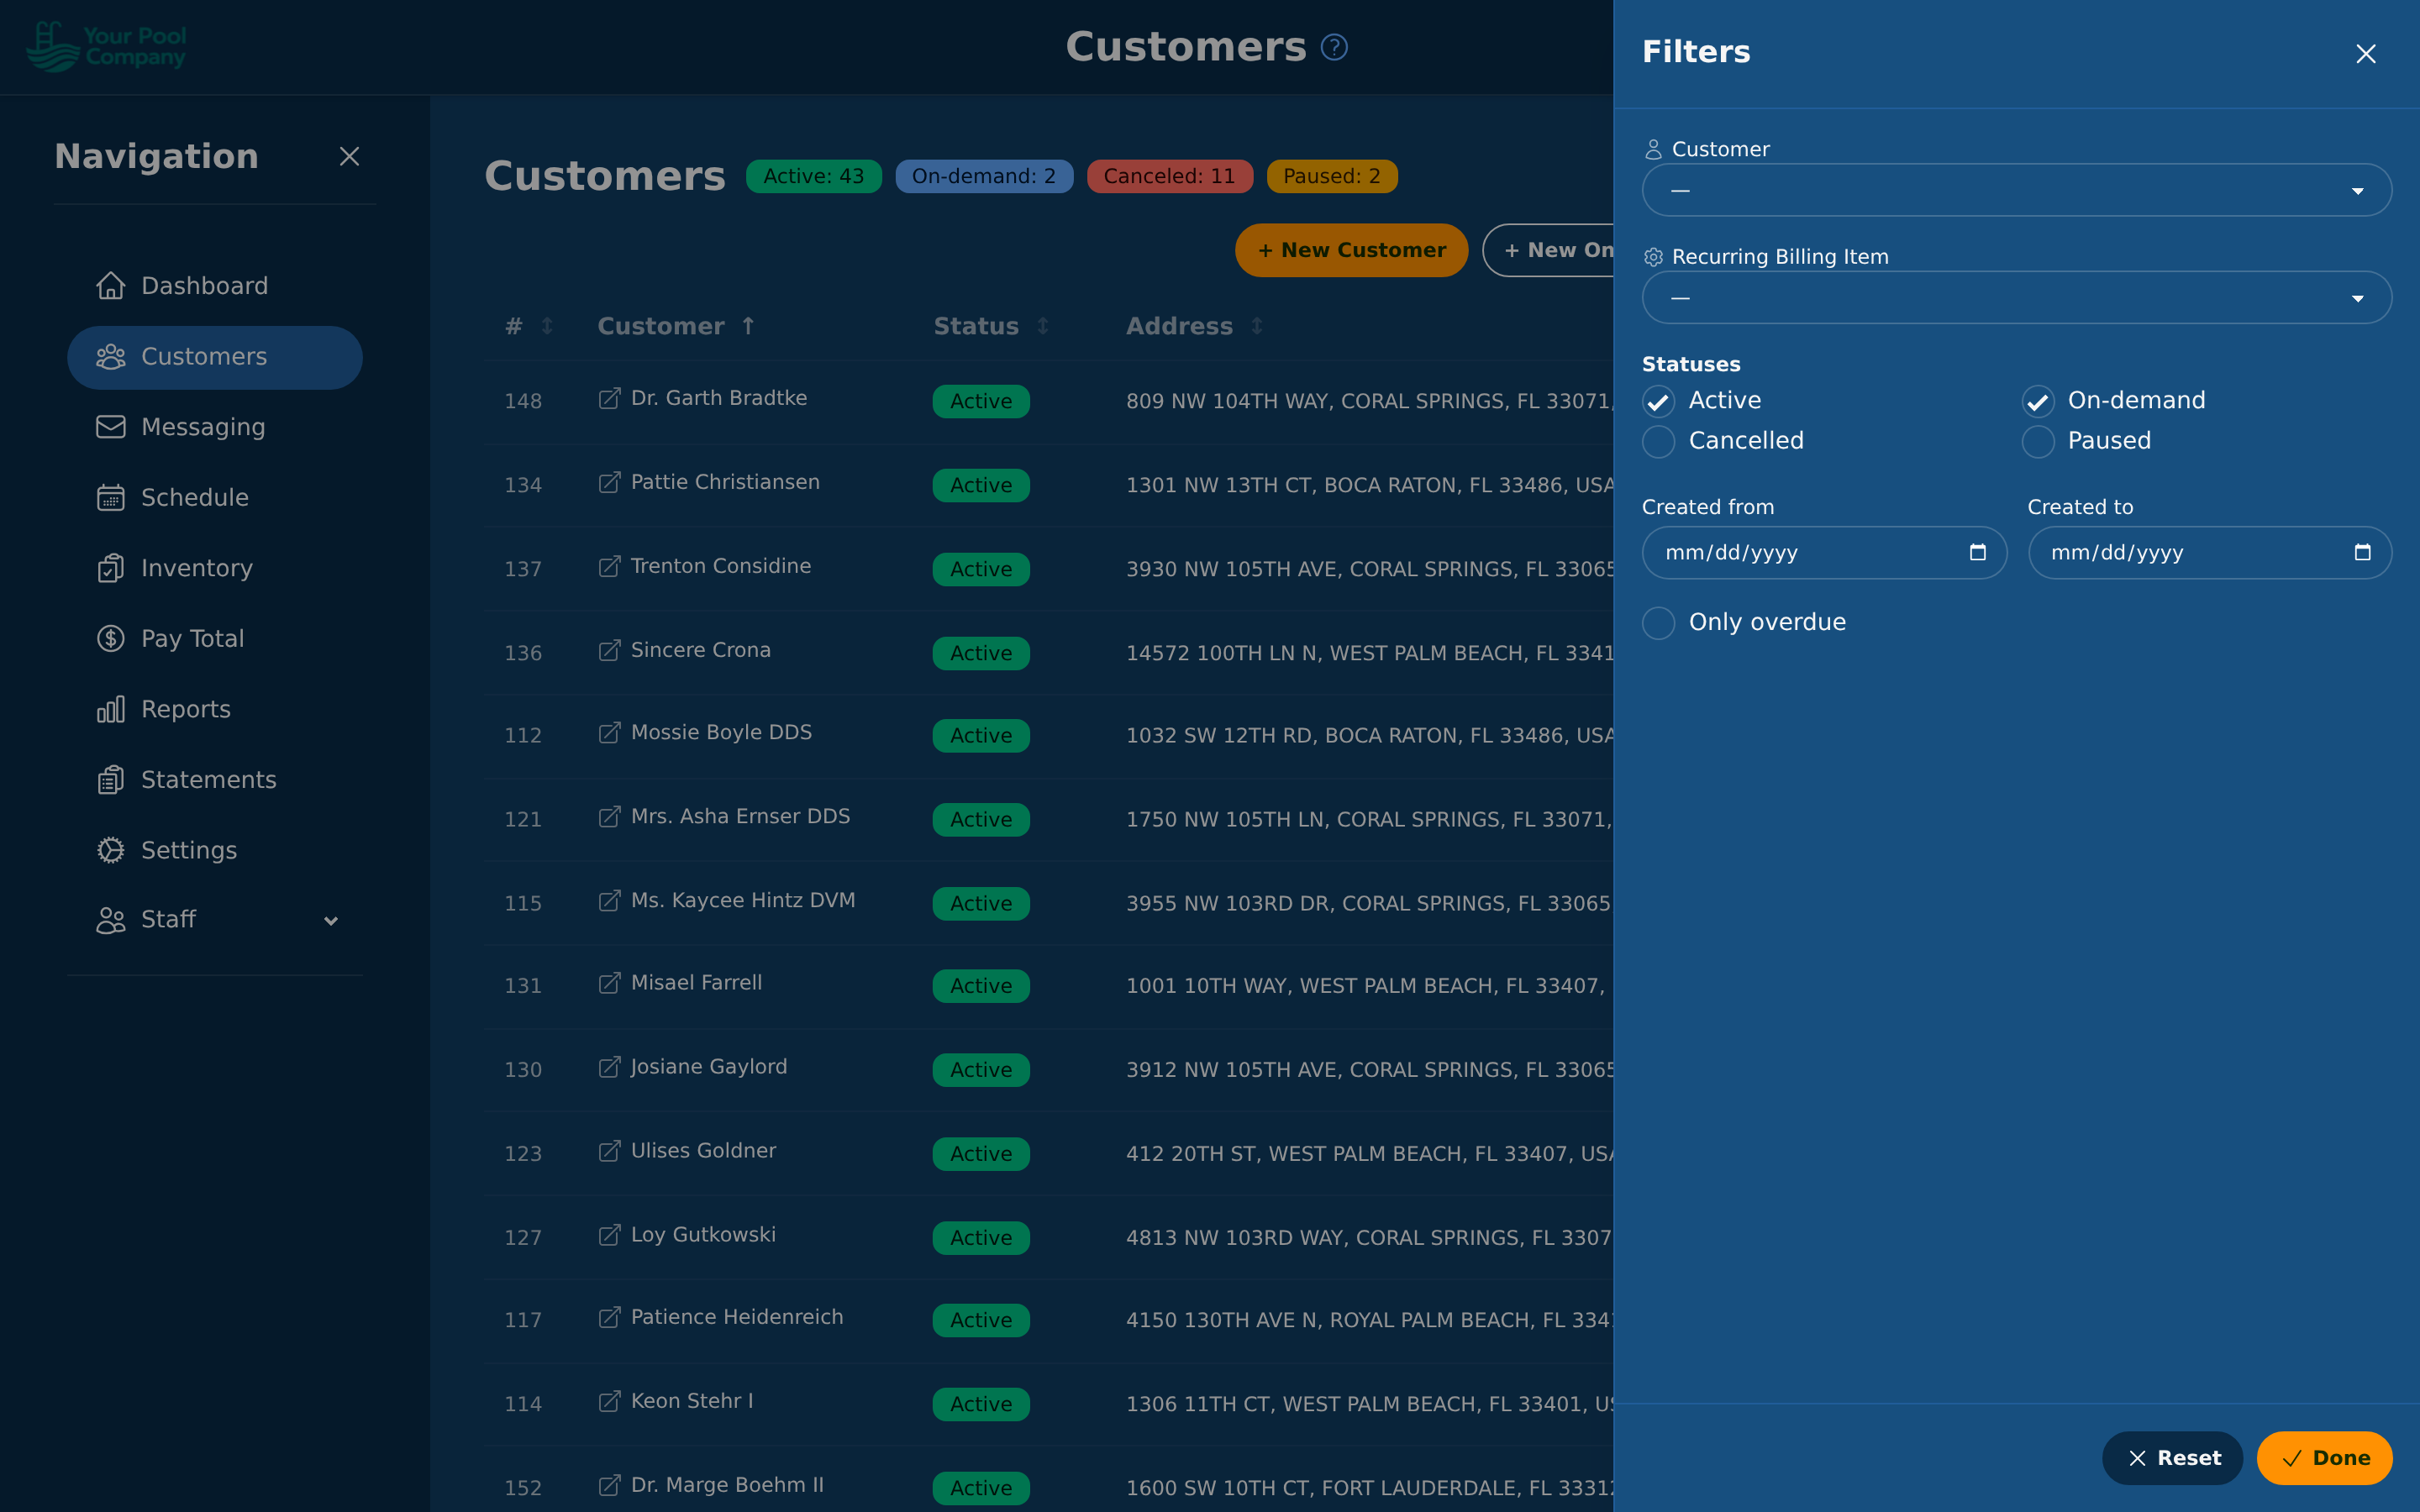
The list shows Active and On-demand customers by default — the people you're actually working for. Use the status filter to include Paused or Canceled ones as well.
4.6 Changing a customer's status
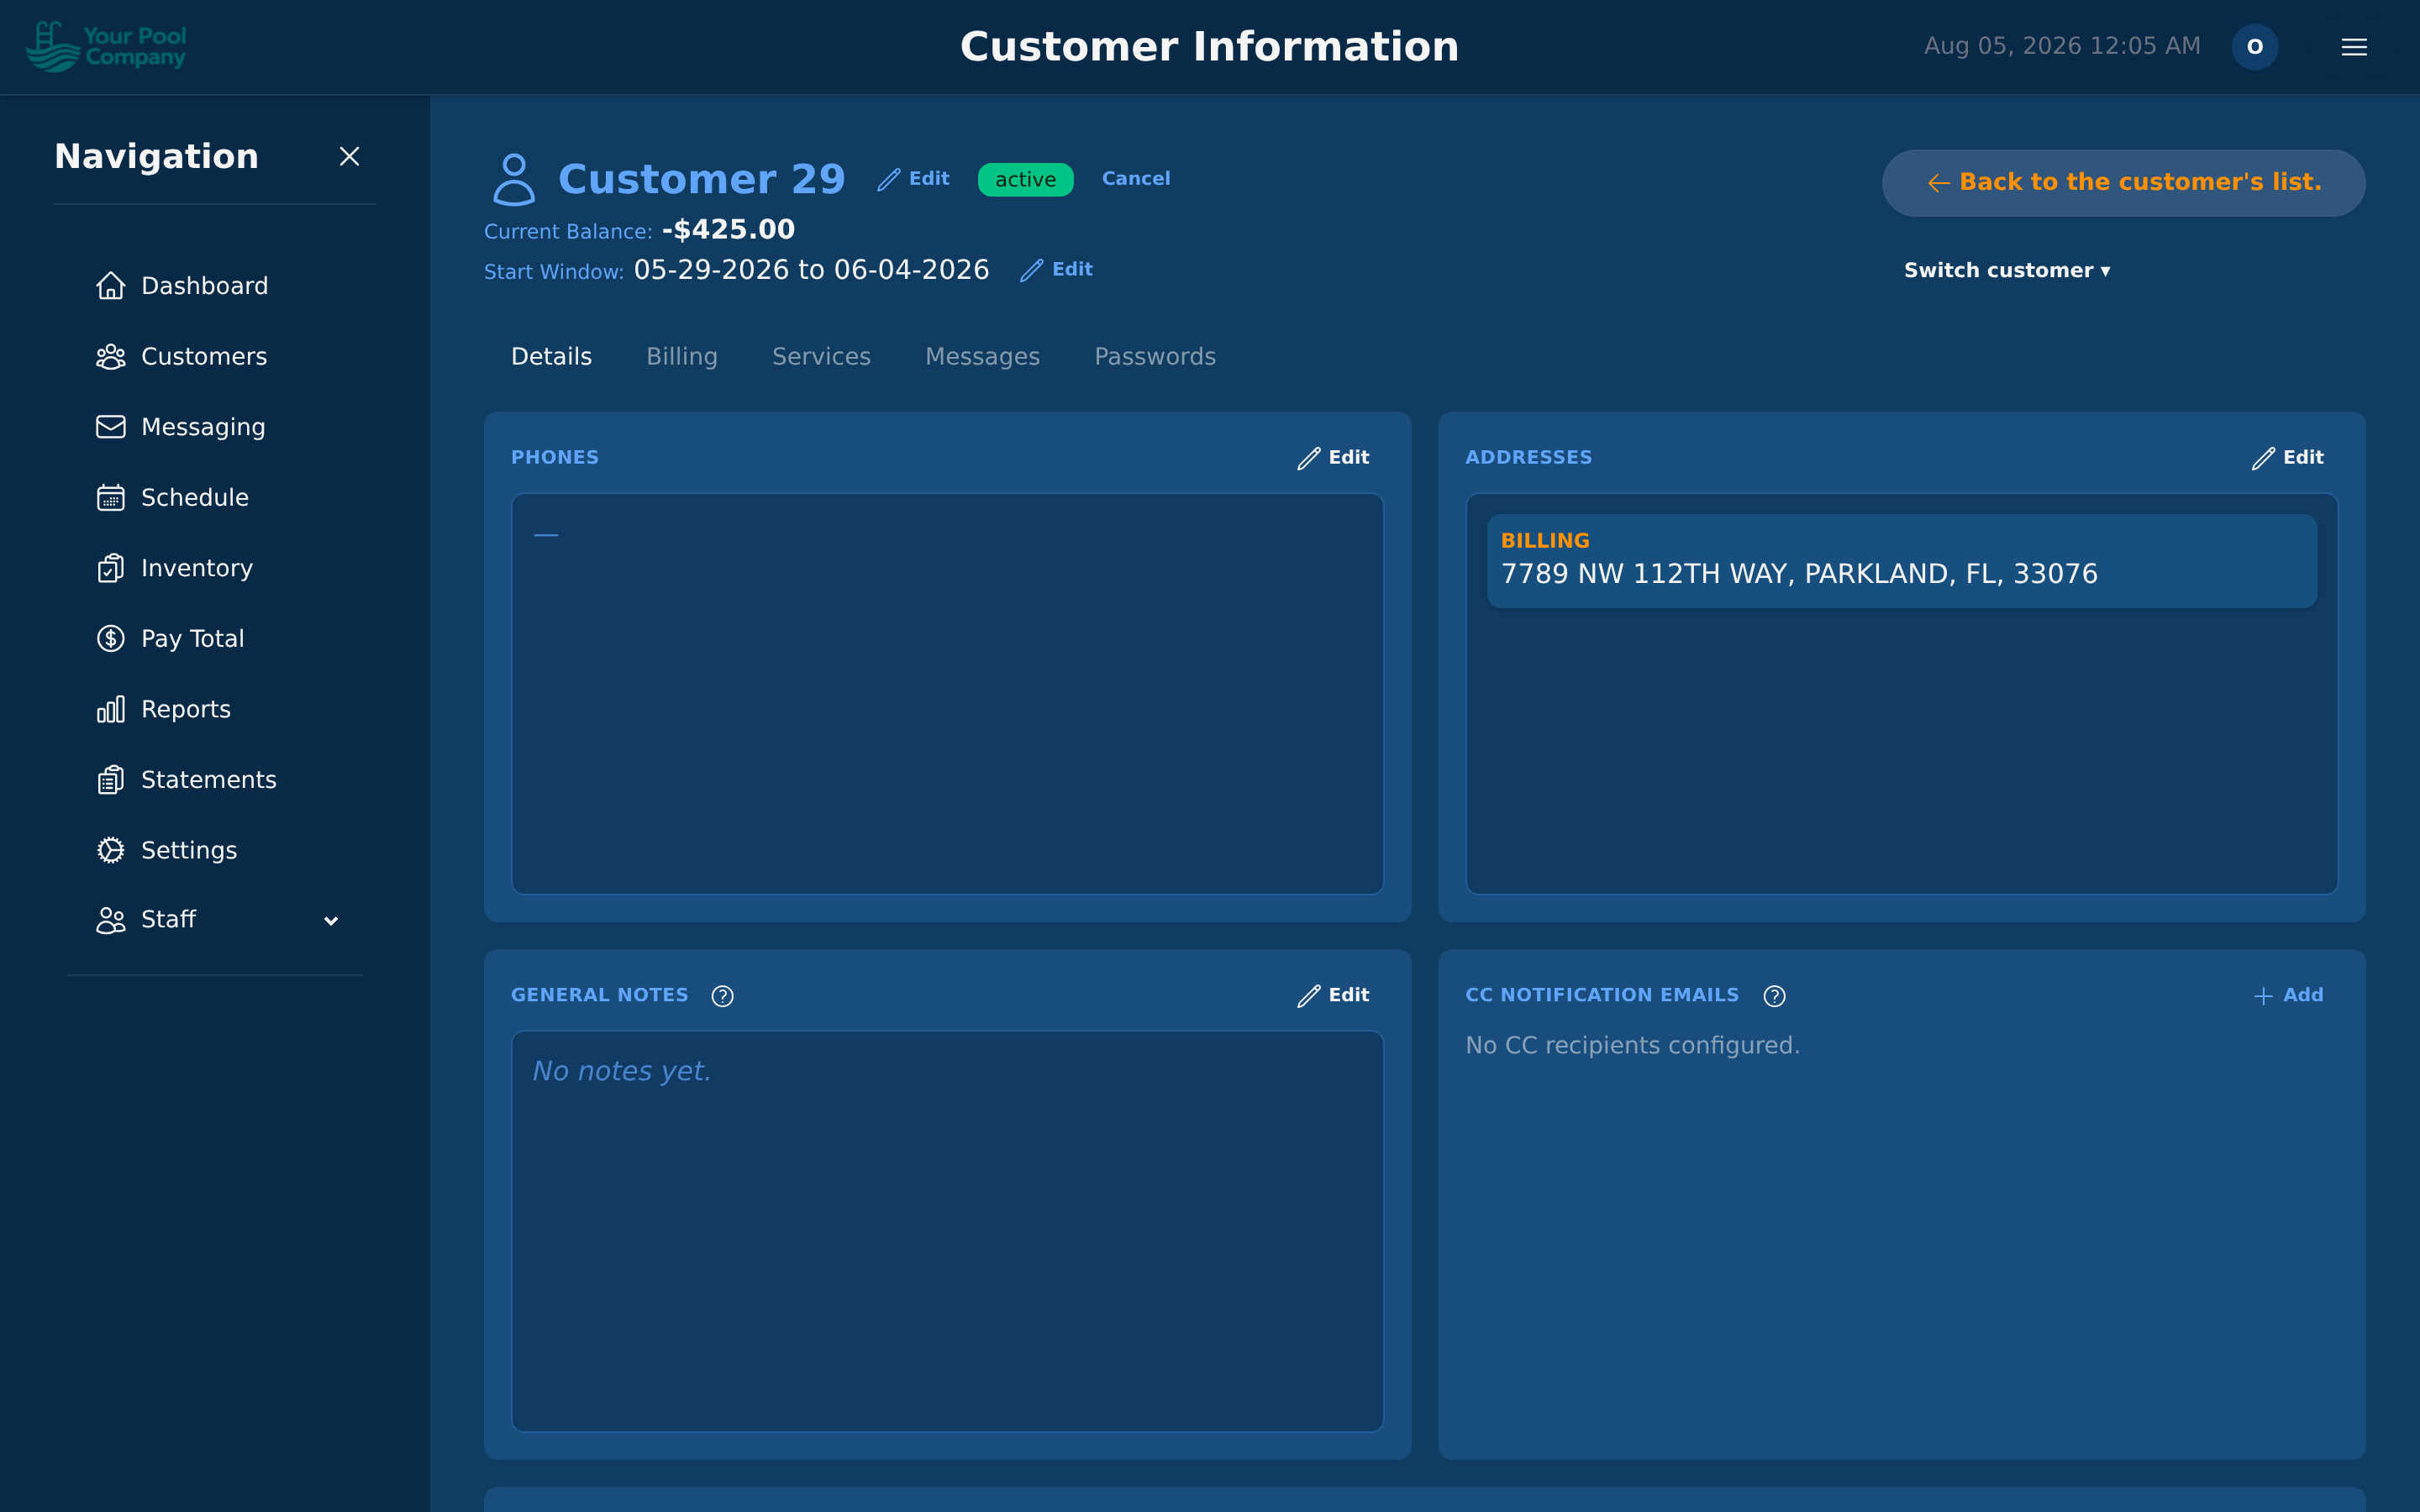
Open a customer and use the buttons at the top of their page:
| Button | What it does |
|---|---|
| Cancel | Stops their services. They stay in your records |
| Reactivate | Brings a canceled customer back |
| Convert to subscriber | Turns a one-off customer into a regular one — see Section 8 |
| Mark on-demand | Moves a customer to one-off work only |
You'll only see the buttons that make sense for that customer right now.
4.7 Customer Info Page
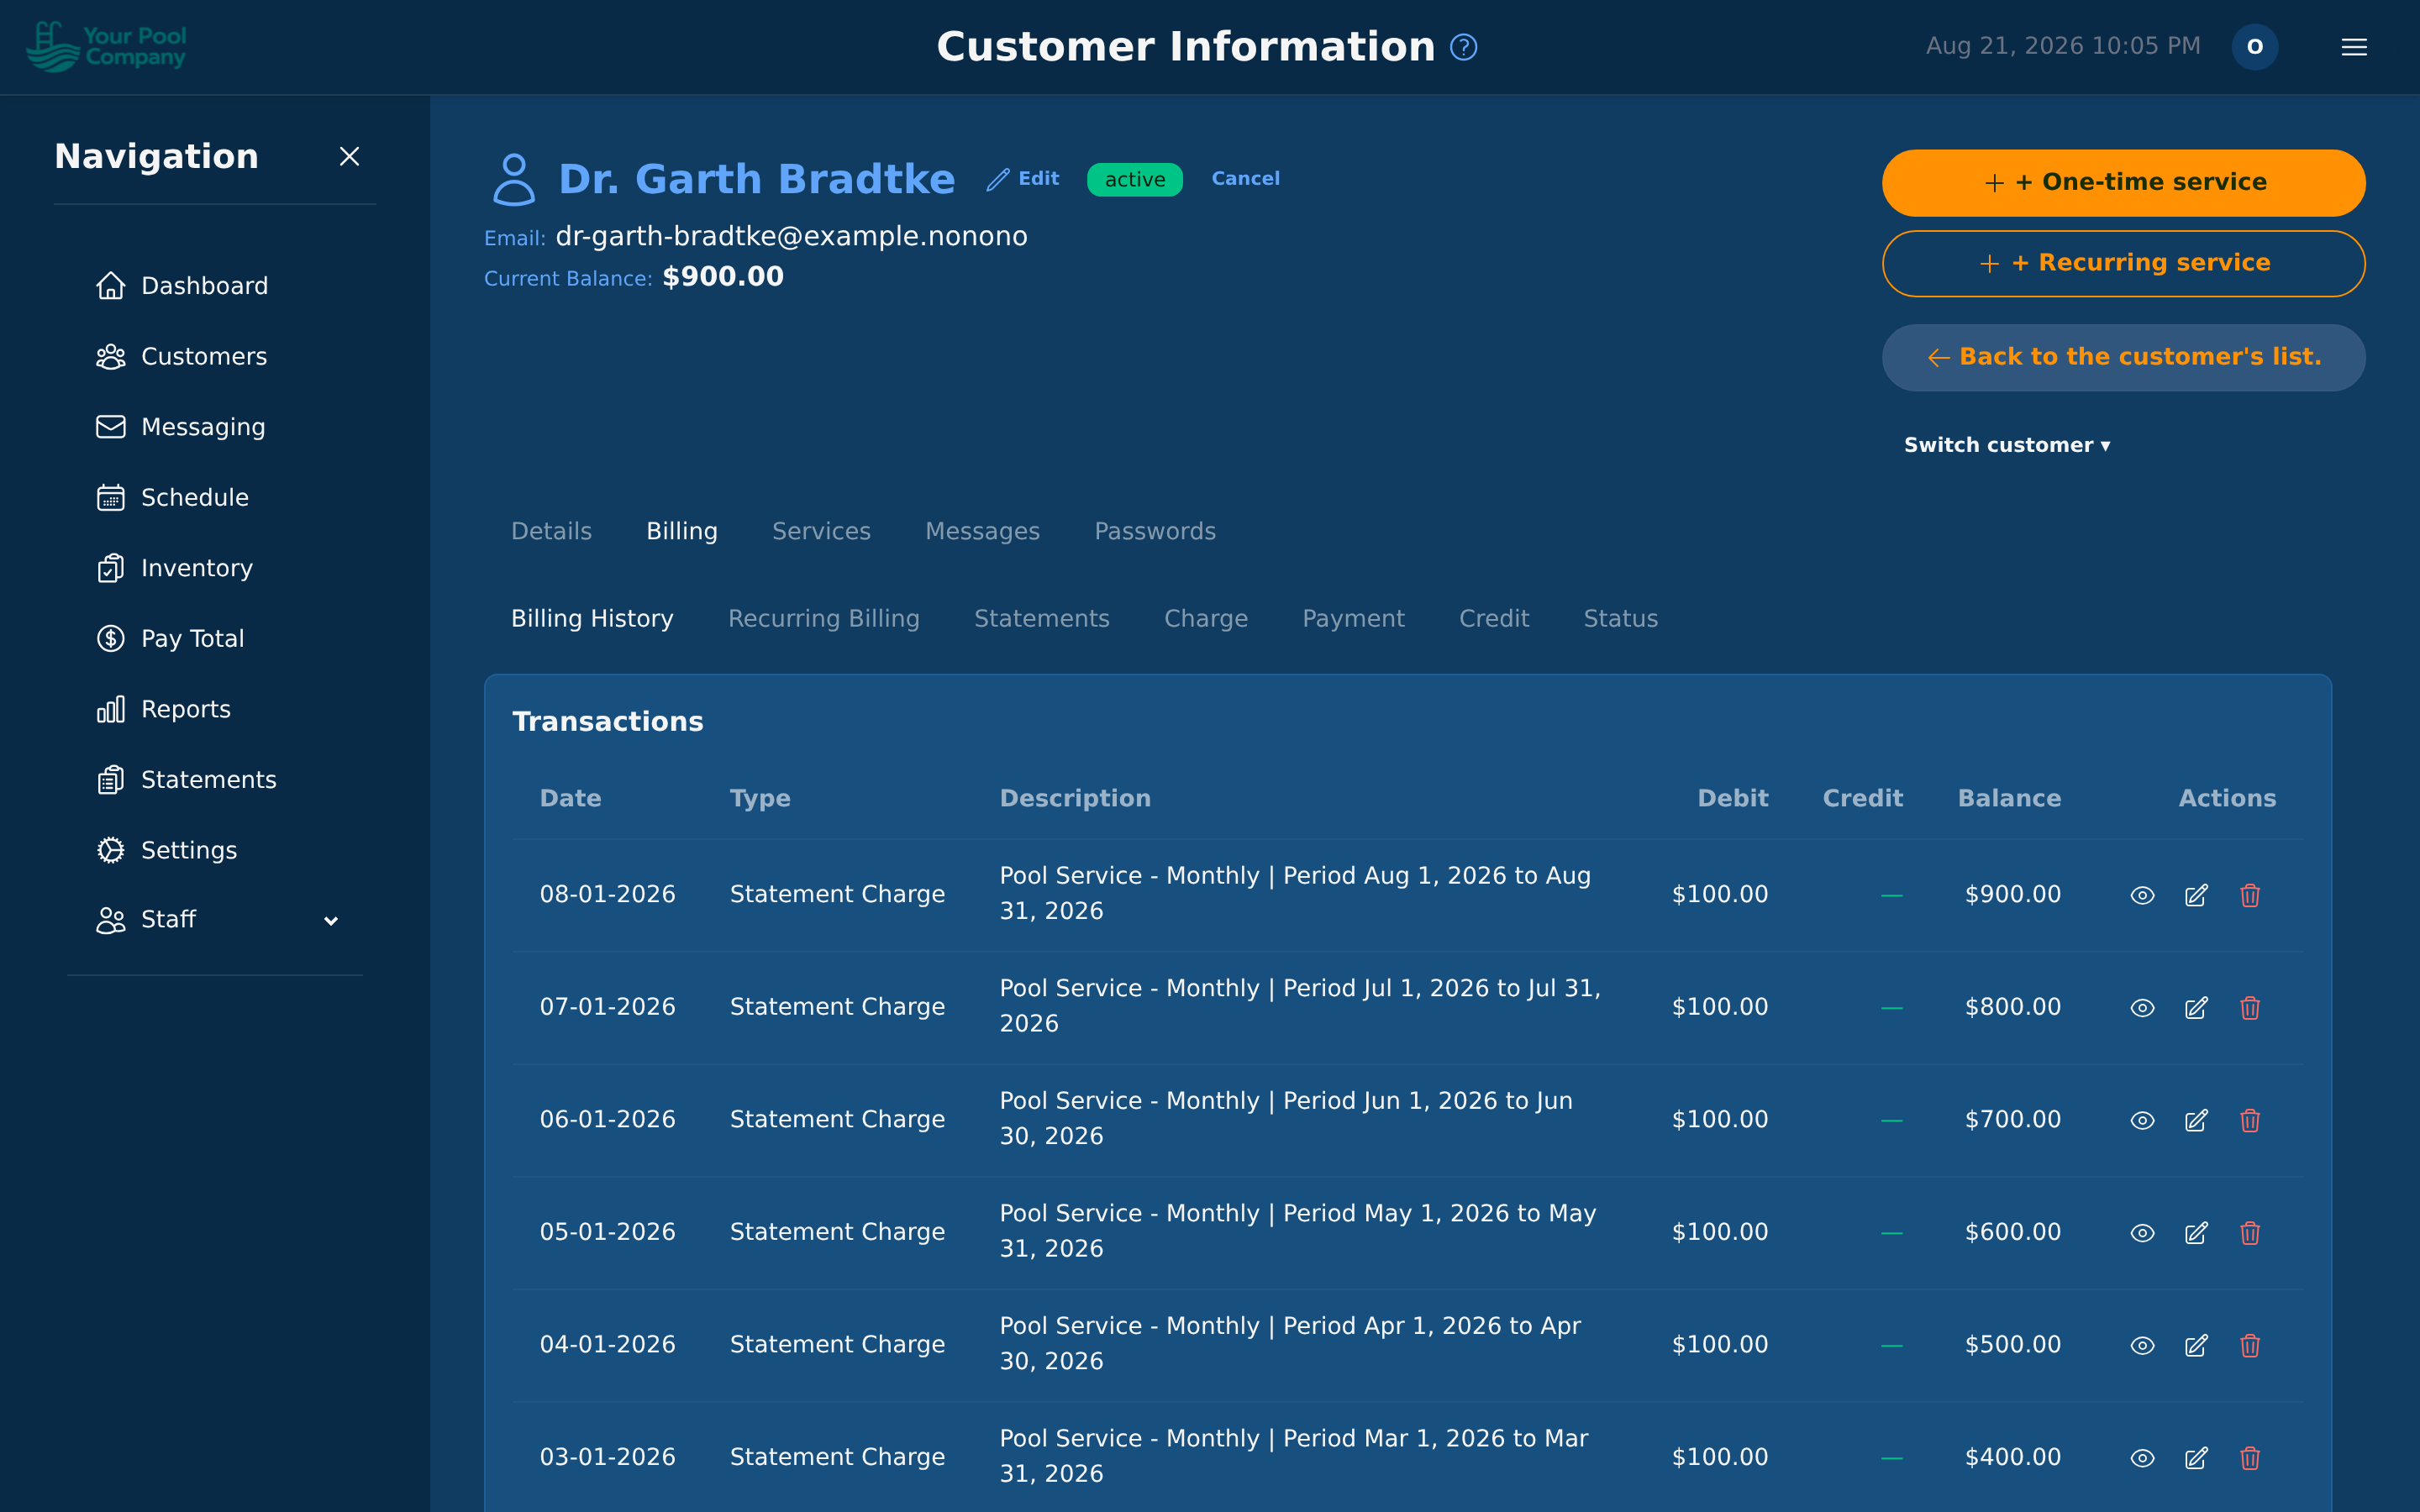
Clicking on a customer's name opens their Customer Info Page — a comprehensive view of everything related to that customer, organized into tabs:
- Details — name, email, phone numbers, addresses, locations, notes, and notification preferences.
- Billing — a tab with its own sub-sections:
- Billing History — all financial transactions (charges, payments, credits, fees).
- Recurring Billing — active, paused, and canceled subscriptions.
- Statements — monthly statements with opening/closing balances.
- Charge / Payment / Credit — quick actions to post charges, record payments, or issue credits directly.
- Status — current account status and payment method details.
- Services — history of all service visits (completed, pending, missed).
- Messages — communication history (emails and SMS sent).
- Passwords — manage customer portal access and reset credentials.
This is your one-stop view for everything about a customer.
4.8 The Services tab — every visit for this customer
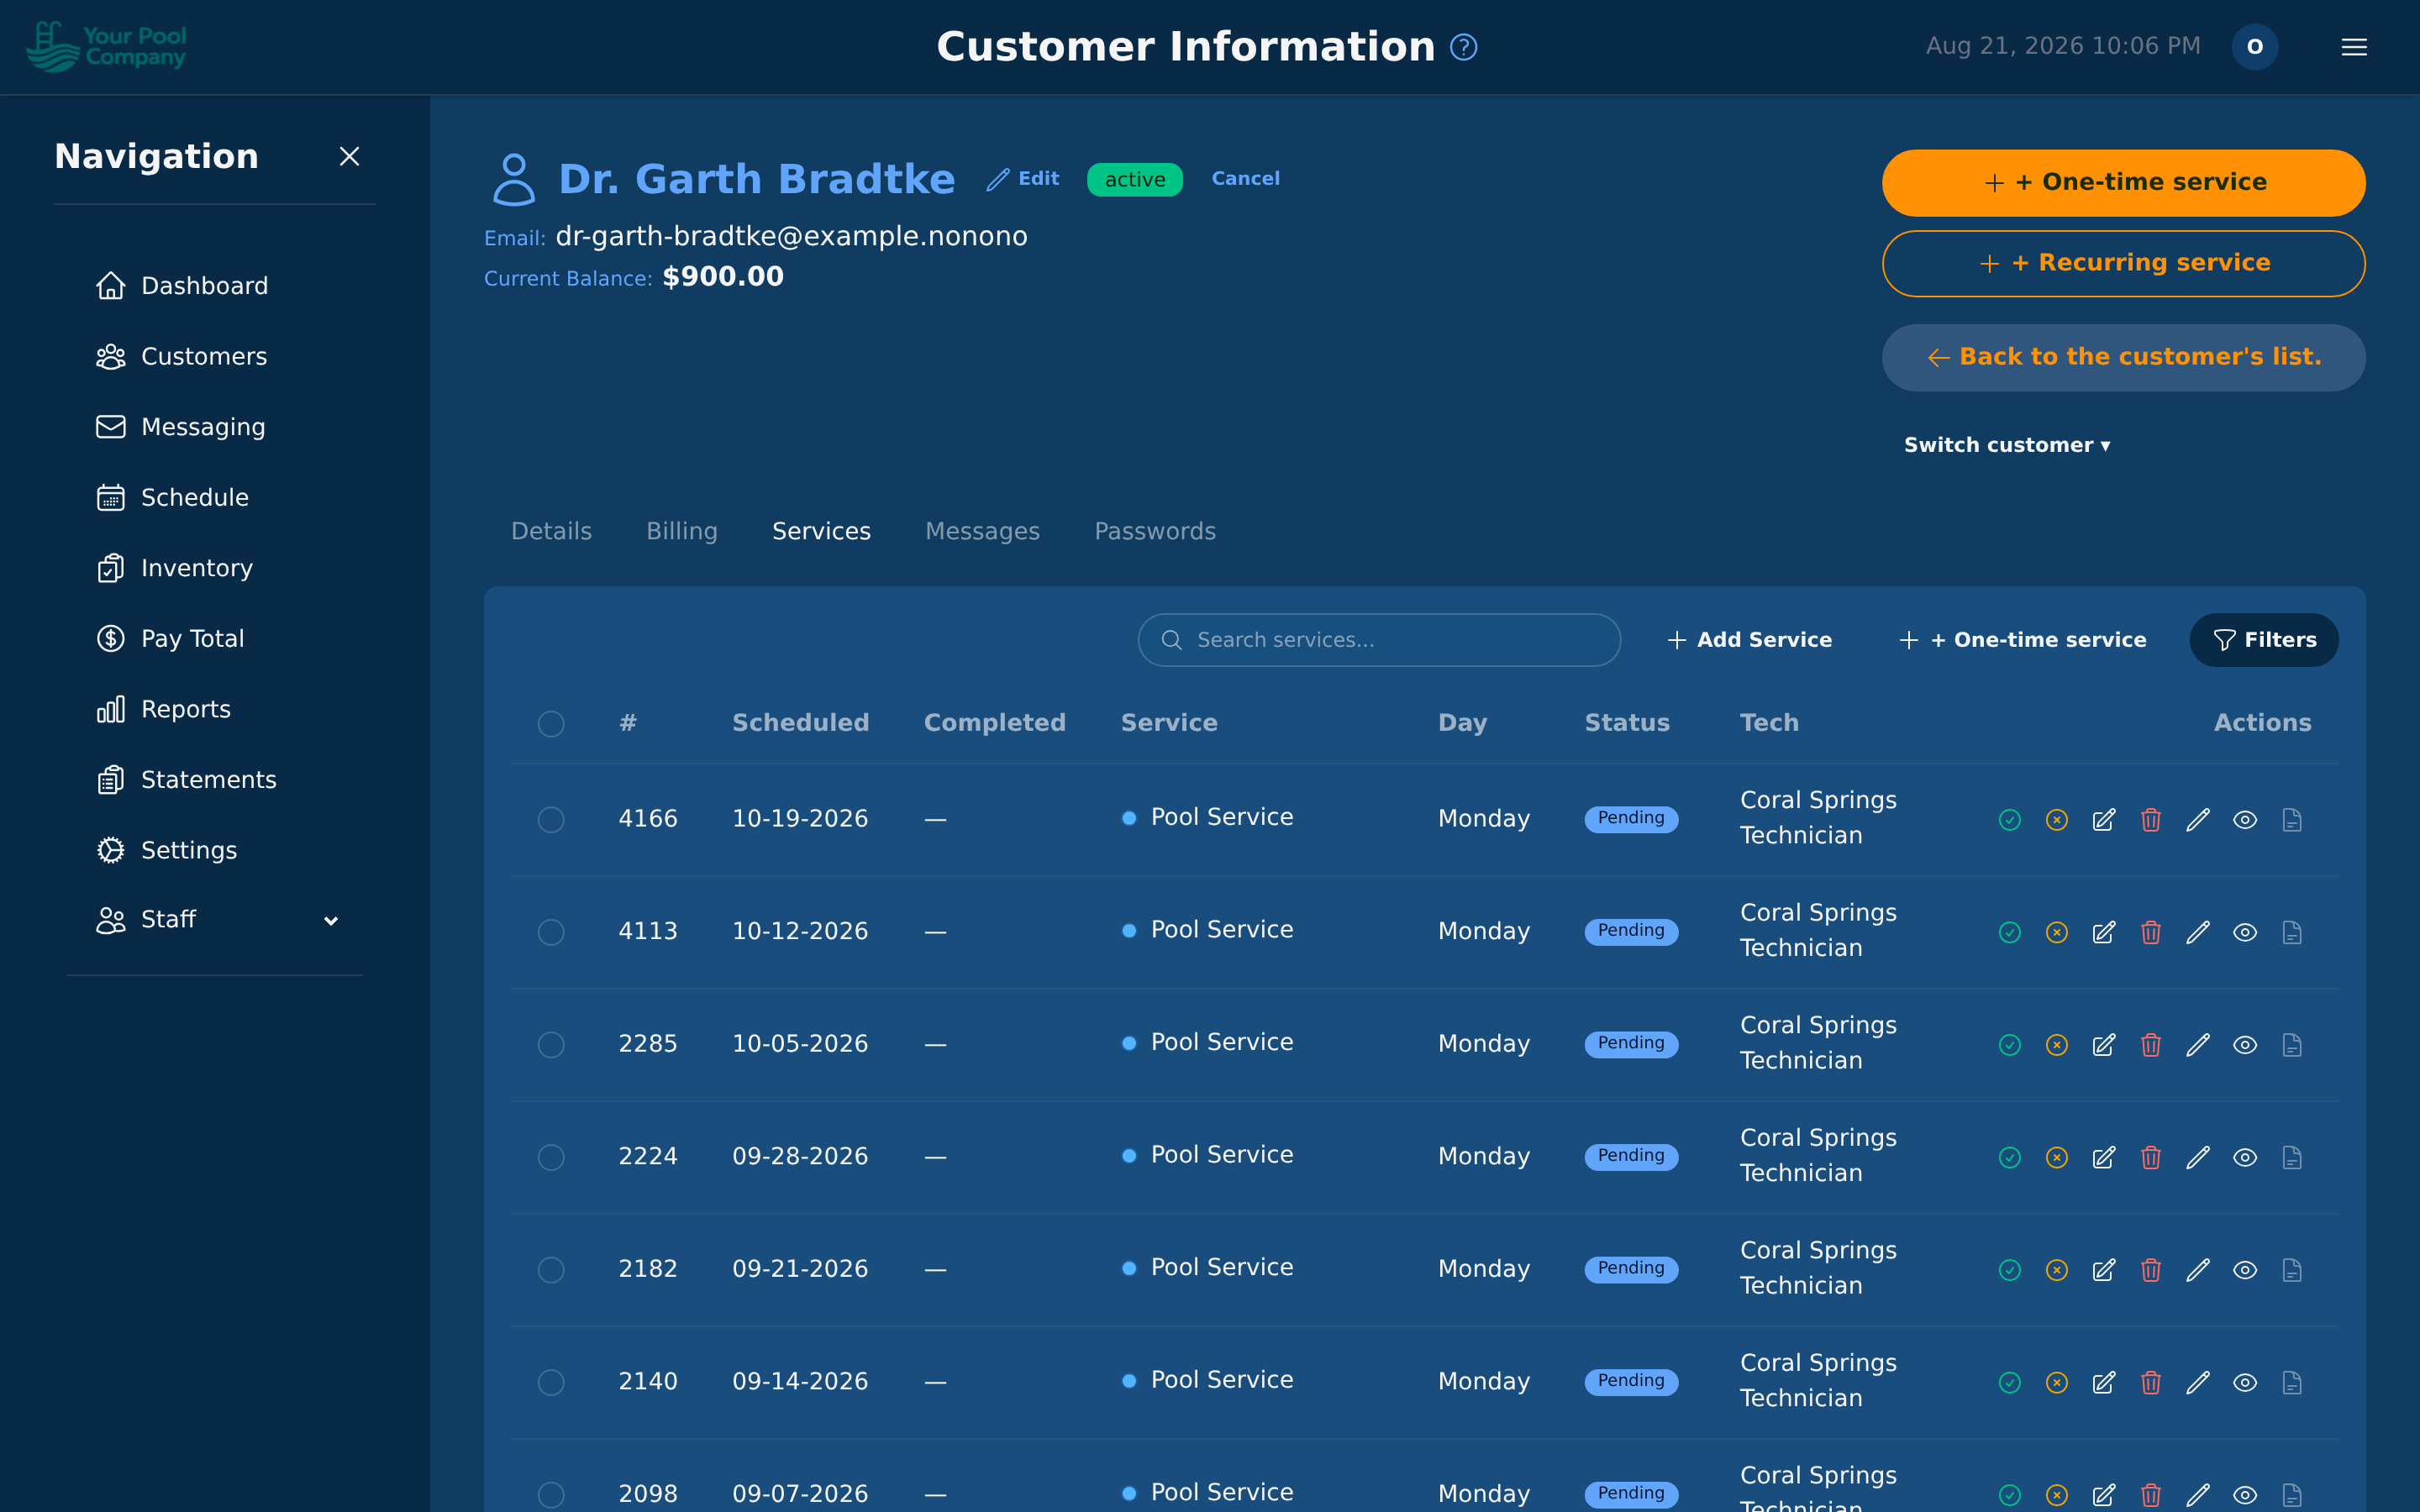
The Services tab on a customer's page lists every pool service for that customer: the ones already done, the ones still to come, and the ones that were missed. It is the place to answer "when were we last there?" and "what is booked next?".
Finding a visit. Search by anything on the row, or open Filters to narrow the list by service, date range, technician, location or status. Only Overdue shows just the visits that should have happened and haven't.
What you can do to a visit:
| Action | What it does |
|---|---|
| View | Opens the full details of that visit — including what the technician recorded |
| Edit | Change the date, the technician, or the location for that one visit |
| Mark completed | Closes the visit from the office and posts the charge for it |
| Delete | Removes the booking |
| Sell a service | Adds a one-off job for this customer — see Section 8 |
| Add | Adds another visit to one of their repeating plans |
Tick several rows to work on them together: Edit changes them all at once, and Delete & Recreate rebuilds them from the plan.
Service Notes — notes about one visit
Underneath the list is the Service Notes panel. It shows the notes attached to individual visits, one row per pool service:
| Column | What it holds |
|---|---|
| One-time Note | Something you typed for that one visit — "gate code changed", "skip the filter this week" |
| Visit Customer Notes | What the technician wrote for the customer to read |
| Technician Notes | What the technician wrote for the office |
A one-time note is meant to be seen by the technician doing that specific visit, so it's how you pass on a one-off instruction without changing anything permanent.
Which kind of note do I want?
- It's true every time you go → customer notes (see 4.4).
- It only matters on one day → a one-time note on that visit, here.